Open up “Pizza” Folder from Google Classroom (GC) and drag it onto your Flash drive.
Open PS from the Launchpad
Create a new document File > New > Letter, make sure its 300 dpi, name it “Your Name Pizza” hit OK.
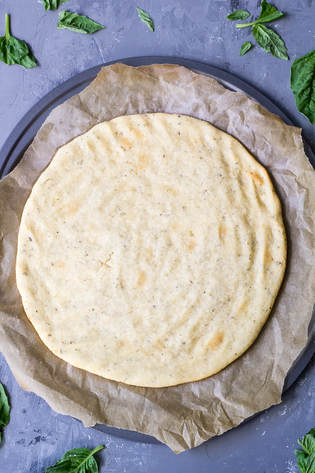
Drag “Crust” image from FD onto your document.
Resize the image by dragging the corner square while holding Shift to keep proportion. Drag until the width is filled with the image, center if necessary.
If it is a “Smart Object” (has a small icon on thumbnail image), hold Ctl + right click. On drop down menu, click “Rasterize Layer”.
SAVE document onto your FD as a PSD.
Create a new Layer by clicking on icon at bottom of layers palette and name it “Sauce”.
Select the Brush tool (B) and change brushes from the drop down menu in the Options bar. Hit the down arrow and in the window, scroll over to the gear down arrow. You can experiment with a variety of brushes, the one I recommend is “Thick Heavy Brushes”, click OK in pop up window. Select 104, change size with bracket keys.
Click Foreground color swatch from tool bar, use slider in window to change color, use cursor to pick color for sauce.
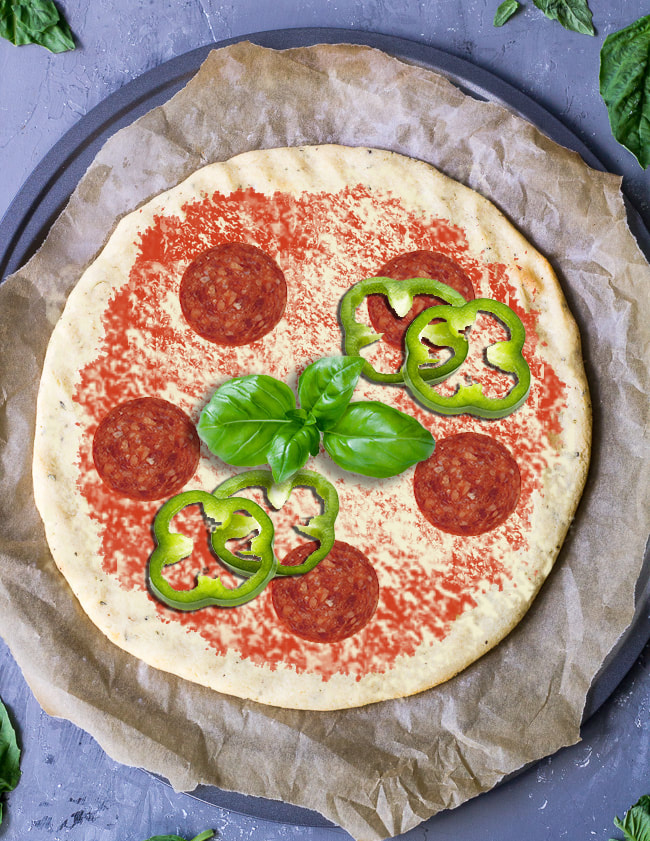
Paint sauce on top of crust leaving space on the edge.
SAVE (Cmd + S)
Create “Cheese” layer and select a brush from “Faux Finish Brushes”, choose 120 (square shape). Change color to very pale yellow. When Painting cheese, leave some red sauce from the layer below showing through. Use bracket keys to change size, use erase tool (E) erase from unwanted areas.
SAVE
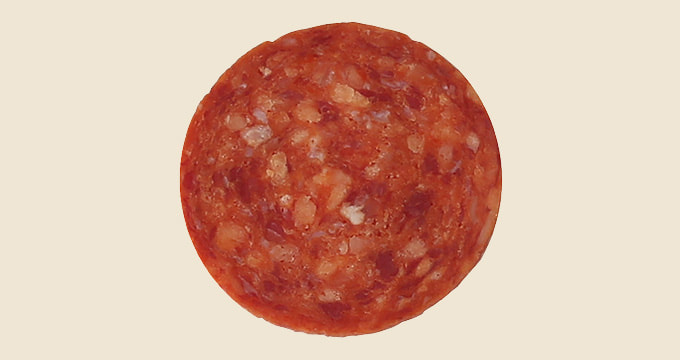
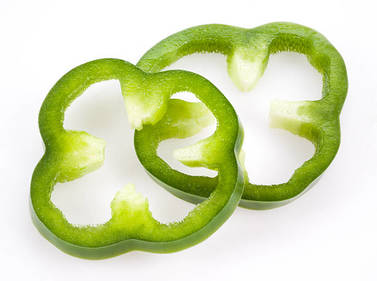
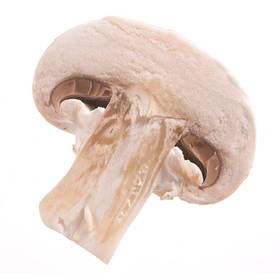
Select at least 3 toppings for your pizza, drag first topping in from your FD. This will be a Smart Object, to rasterize the layer, Ctl + right click on icon in layer, “Rasterize Layer” from pop up menu (symbol on layer icon will disappear)
Resize image to be proportionate to pizza (Cmd + T).
To achieve more dimension, you can add a drop shadow by clicking on fx on bottom of layer palette. Choose drop shadow and adjust sliders to the effect you want.
SAVE
Duplicate the layer an odd number of times (Cmd + J) and move topping randomly on top of pizza. Remember to click on layer of item you want to move.
Continue this procedure with two more toppings. To create a more realistic image, overlap some items and change size, shape, orientation, etc. with Cmd + T. You can also reorder layers to place items on top of others