Materials
Day 1 of Cubism
Day 2 of Cubism
- White scrap paper
- A sheet of trace paper with a sketch of the image you plan to “cubize”
- A sheet of blank trace paper
- A 2B and 4B pencil and eraser
- Tape
- Ruler
- French curve *optional
- Sheet of tonal paper
- Transfer paper
- Colored pencils (including black, white, and one color for accent)
Day 1 of Cubism
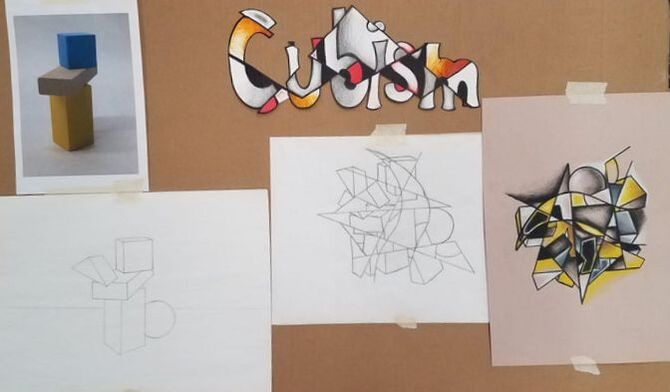
- Place a white scrap of paper on the table.
- Tape still life sketch onto white paper so the image doesn’t move.
- Lay a blank sheet of trace paper over drawing.
- Using a ruler, draw at least 5* lines to divide your drawing into quadrants. (depending on size of sketch you may need to draw more), Lines Should intersect with each other!
- Using a french curve, add 1 or 2* curved lines.
- After you finish making your geometric pattern on your fresh sheet of transfer paper, you may rotate your page over your still life and sketch your drawing into the sections of your geometric pattern.
- You may rotate, slide over, shift up, and turn your trace paper sideways to break up your still life!
- Your drawing should start to look like broken glass
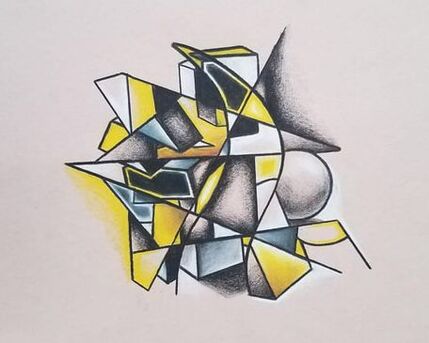
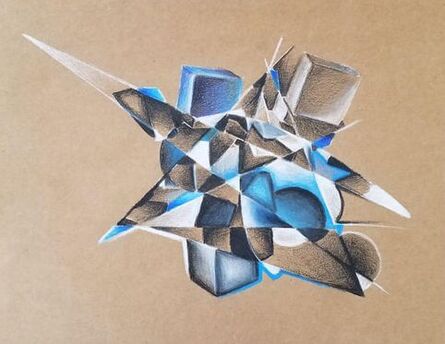
Day 2 of Cubism
- Transfer your Cubist drawing onto tonal paper. (don’t forget your ruler for the straight edges)
- On your tonal paper, darken your lines with a black colored pencil
- Once your lines are dark, you may shade each shape using colored pencils that are black, white, or your “accent” color.
- Shading can be a color gradient or a fade from light to dark.
- When shading, you should change the direction of your gradient when you render each quadrant.
- Example: shading left to right, on a diagonal, from outside going in.
|
|
